
Installation project: New radio
I am writing this as a note for memory regarind the installation of a new head unit in my Citroen C3 from 2002. I write as I research, so I’m by far no expert on this. So to anyone reading this: I’m really not an expert!
In my research efforts, I started with a forum thread on citroenc3owners.com.
From it, I understood the replacement could be potentially messy, but there was too much lingo I did not understand.
Thus, I started to read and research. The following is my learnings and understanding.
In a standard car installation, the “car stereo” is a reciever (it collects various sound sources such as radio, CD, bluethooth etc), and amplifier, and you connect it to passive speakers. In this setup you connect the head unit (A) to power and control signals, and (B) often the Head Unit. It has passive speakers, so you need 2 lines per speaker. There is an options.
The current head unit
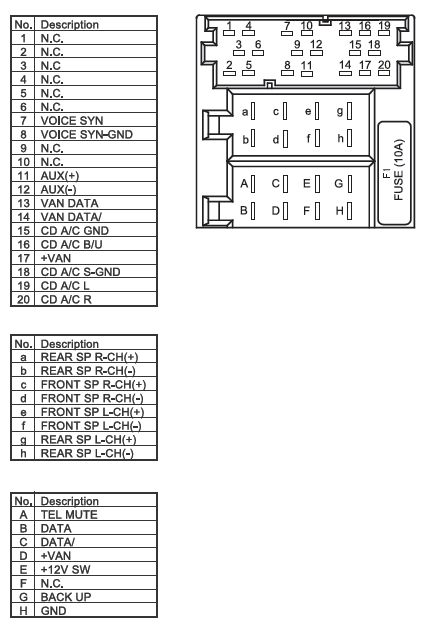
Existing head unit is a Clarion RD3-01 PU-2471A(E). You can find some details on the net. E.g. this link or this one The backside connection points for power, control and speakers have the connections according to the diagrams on those sites (and below). The pages present the diagram slightly different, so I wouldn’t trust them 100%. Rather, I take them as inspiration. In that diagram, VAN means “vehicle area network”, and it comes with a power line (VAN+) and two data lines (VAN bus, VAN bus B). Connection 1-20 where unconnected on my device. Line a-h were connected to speakers. Line A, E and F where also not connected.
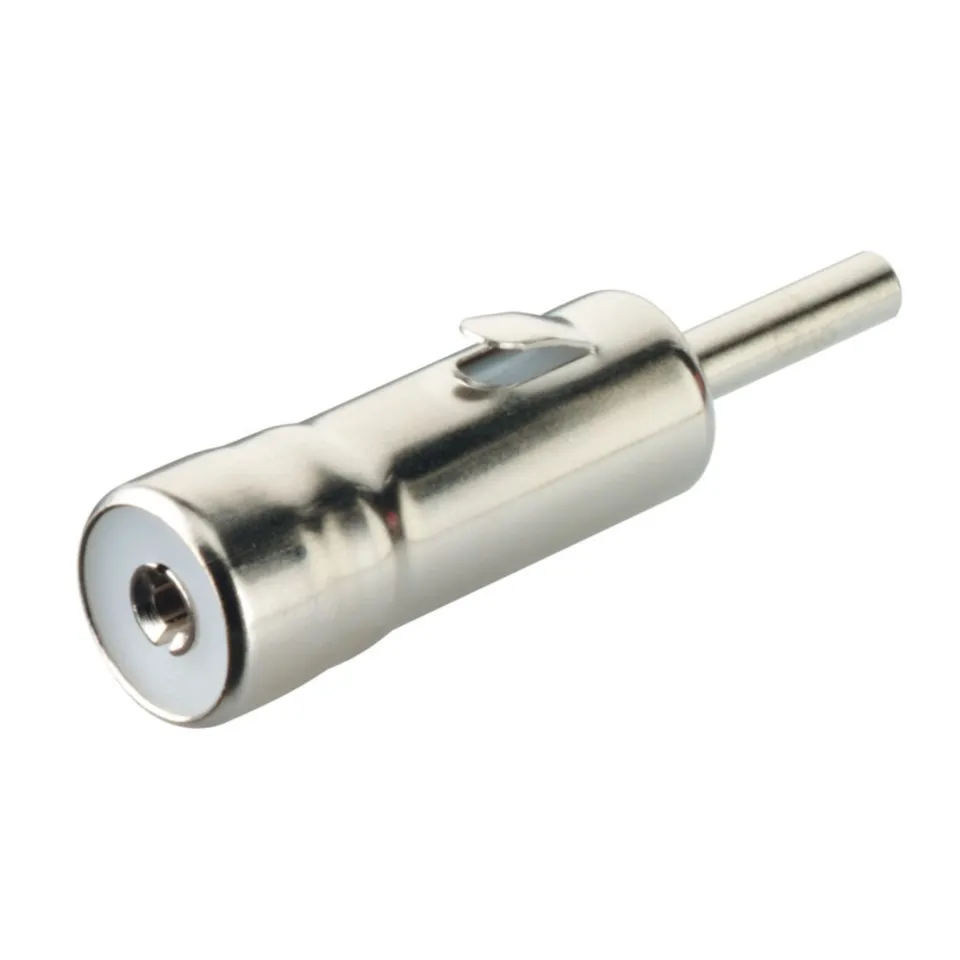
The current installation has an ISO radio antenna connection. I guess ISO 10599-1:1992 is the appropriate standard. However, I have not been able to cofirm that, but there are “ISO adapter” connectors for coaxial cables. And that worked for me. :)
To extract the radio from the housing, I also needed extraction keys. I got these, and they worked. It was by recommendation from one of their salesmen, so they knew it was the right one.

What to put in
I bought a new Pioneer MVH-S420BT. Mostly because it is a small, cheap head unit, with all features we needed and nothing more. It was also on sale (I think the replacement model is coming out). I also liked that it did not have a CD reader, which takes unnecessary space.
It comes with standard connectors, ISO 10487 for speaker power and control, and a DIN 41585 “Motorola” radio antenna cable. The pinout below is by James Beckett, a wikipedia contributer.

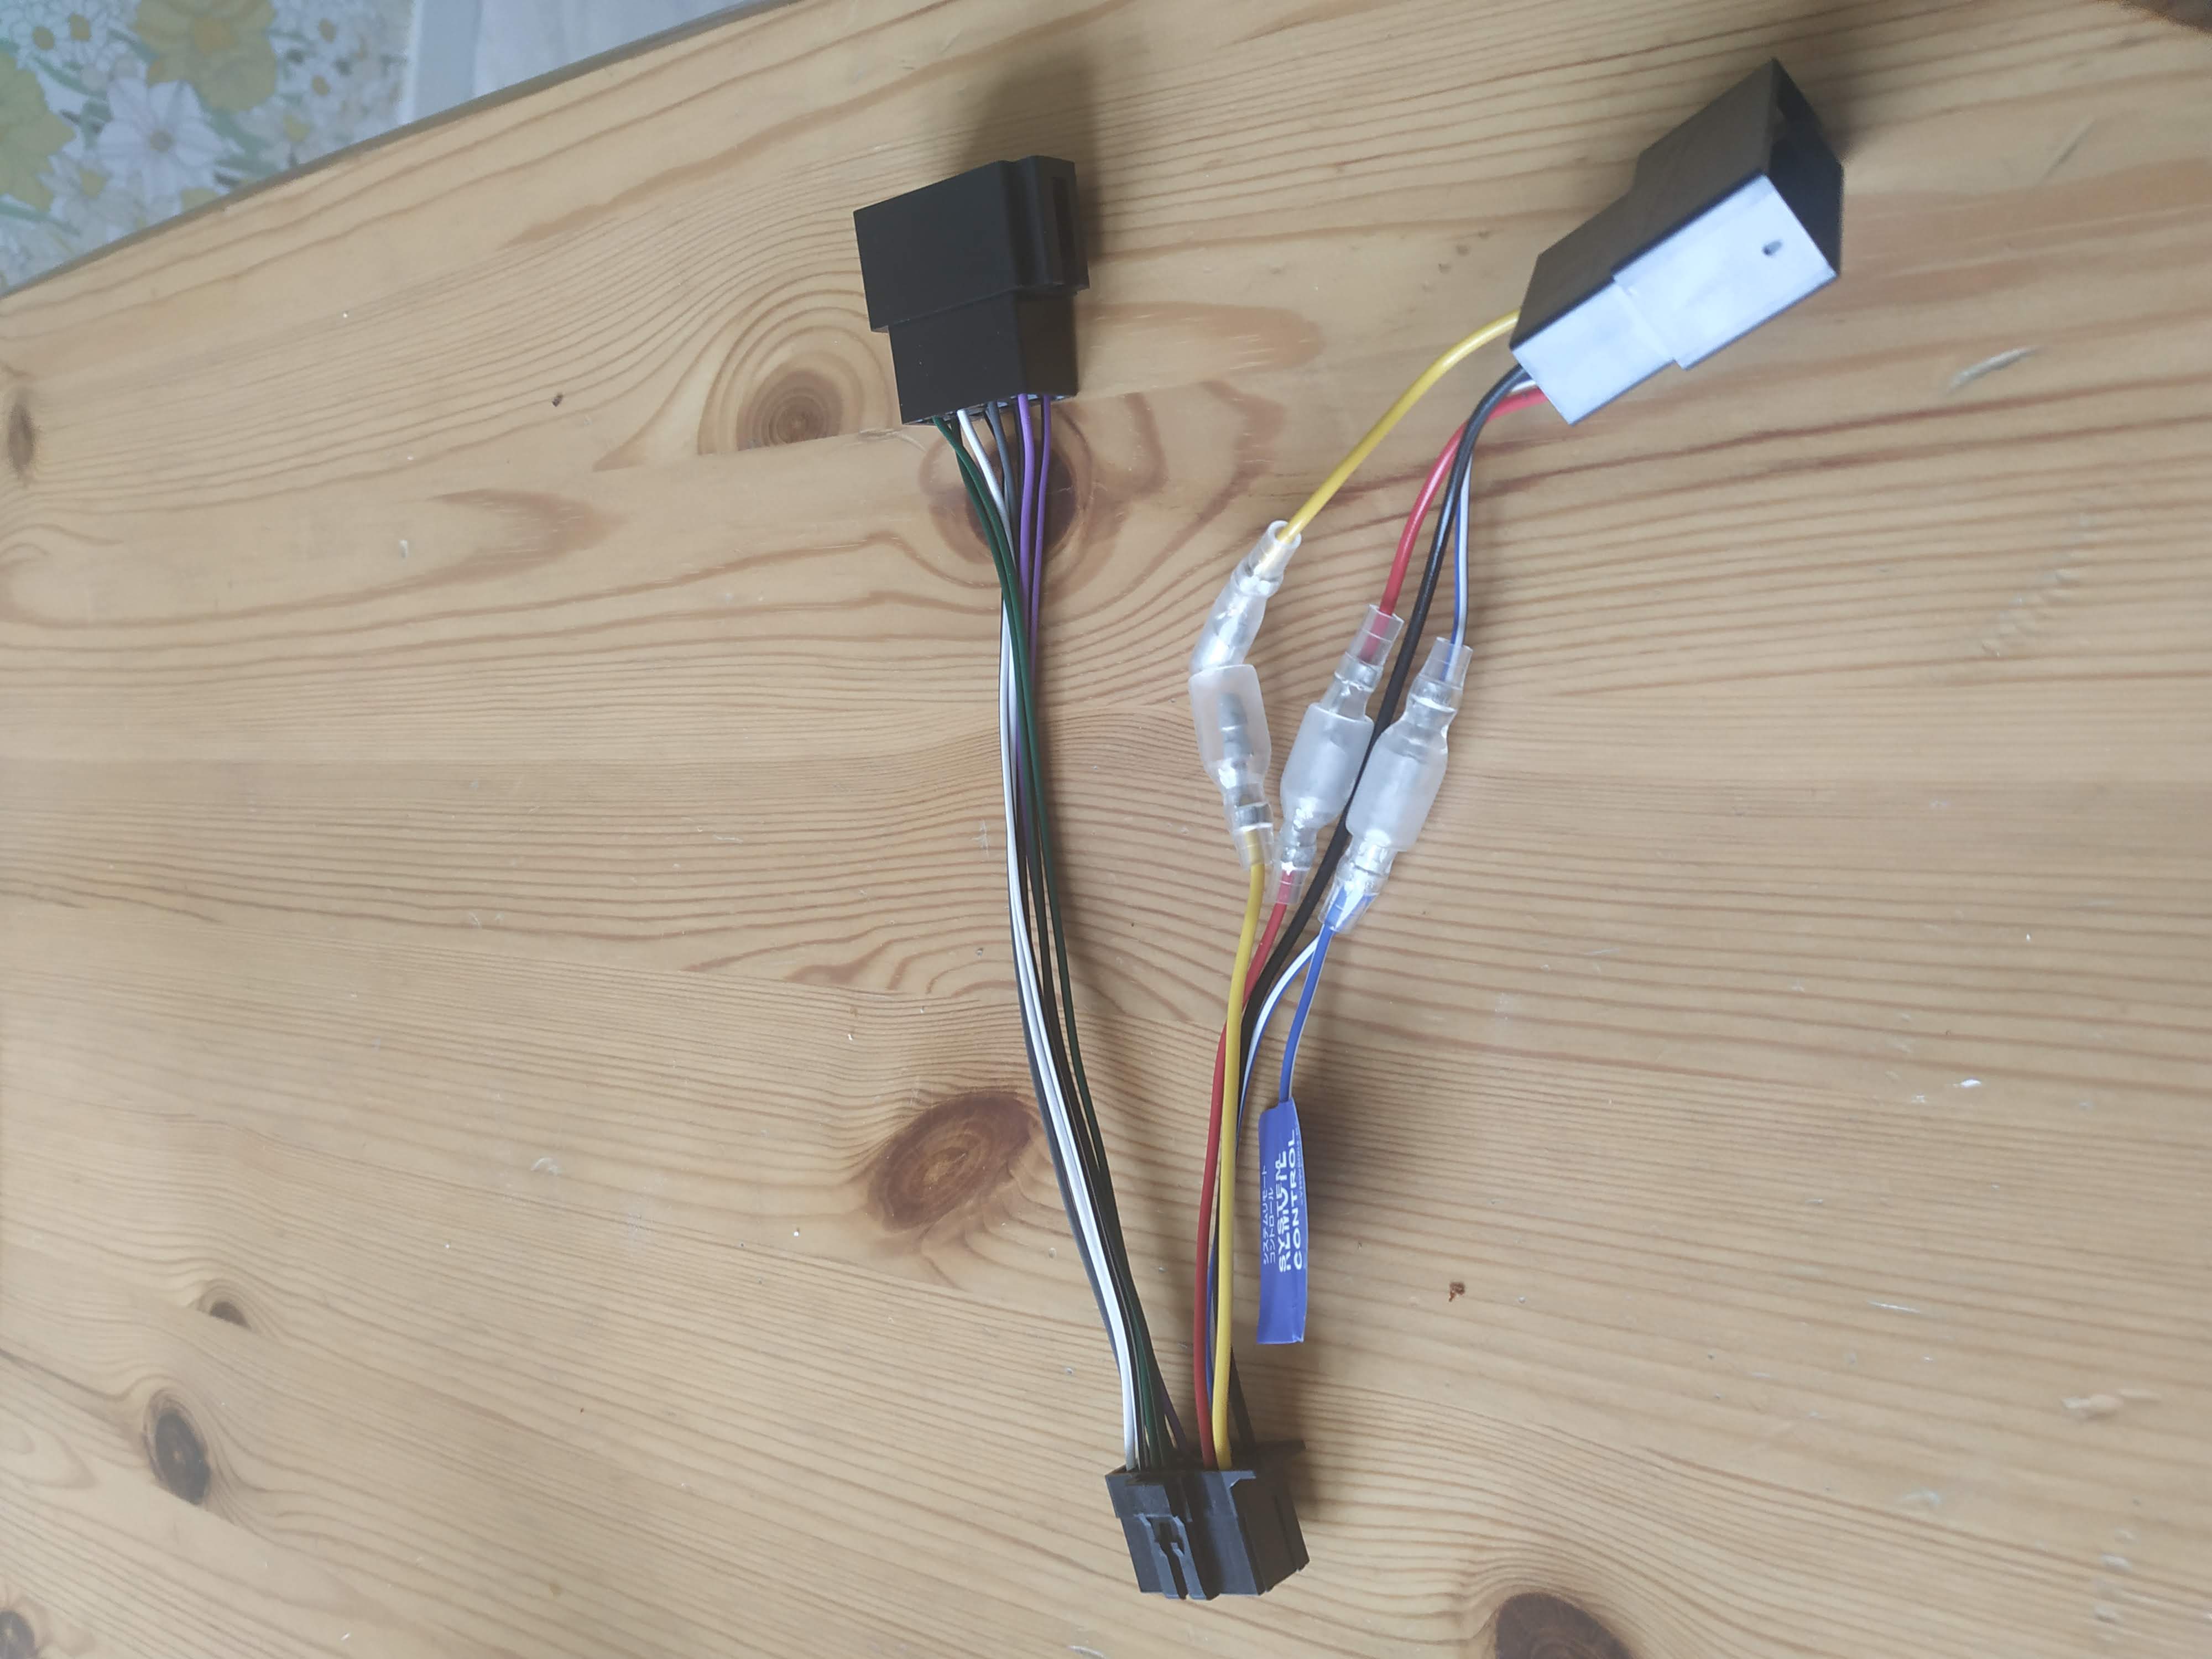
It also has bullet connectors on the wires for pin A4, A7 and A5, so that they can be easily switched around (this will come in handy!). They are color-laeled Yellow, Red and Blue-White.
Need for adapters
First, I need a ISO to DIN adapter. There are many out there. I got the simplest one I could find, and it worked well.
By comparing with the ISO 10487 with the pin out for the RD3-01 PU241A I get the table below. The naming of the pins differ a little.
| Connector | ISO | Clarion | Comment (from wikipedia) | Was connected in my C3? |
|---|---|---|---|---|
| A1 | Speed signal | Remote Mute from Mobile Phone | Optional | No |
| A2 | Phone mute | Comfort VAN Data Bus | Optional | Yes |
| A3 | NC | Comfort VAN Data Bus B | Optional | Yes |
| A4 | Battery | + VAN Comfort | May be switched with A7 | Yes |
| A5 | Antenna motor (out) | Power to Electric Aerial | Yes | |
| A6 | Illumination | +12V IGN Power (Switched via Ignition key) | Optional | No |
| A7 | 12V+ Switched | +12V Main Power (Permanent) | May be switched with A4 | Yes |
| A8 | Ground | Ground (Chassis) | Yes | |
| B1 | Speaker Right Rear + | Speaker Right Rear + | Yes | |
| B2 | Speaker Right Rear - | Speaker Right Rear - | Yes | |
| B3 | Speaker Right Front + | Speaker Right Front + | Yes | |
| B4 | Speaker Right Front - | Speaker Right Front - | Yes | |
| B5 | Speaker Left Front + | Speaker Left Front + | Yes | |
| B6 | Speaker Left Front - | Speaker Left Front - | Yes | |
| B7 | Speaker Left Rear + | Speaker Left Rear + | Yes | |
| B8 | Speaker Left Rear - | Speaker Left Rear - | Yes |
So in conclusion, I needed to switch A4 and A7. However, I don’t get switched 12V+, I get VAN+, which is only almost the same thing. Some erratic behavior could arise. Also, I don’t get the data lines from the Head Unit as expected to the VAN. Thus, some digital features may not work as expected.
Back to citroenc3owners.com
So after making the installation, I got back to This link. After all my reading and hands on experience, the following quote ansered all my questions.
Hello Mikecoop82.
In the wiring harness that came with your new radio there will be a yellow and a red lead. They should have ‘bullet’ connectors on. You unplug these and swap the wires round so red goes to yellow and vica versa.
If you haven’t already got one, you’ll need another wiring harness to convert the Citroen wiring to ISO connectors so you can plug your new radios wiring into the car.
Don’t be surprised if you get some odd behaviour, if you leave the radio on so it goes on and off with the ignition, it might go off a couple of minutes after you turn the ignition off and also come on when you unlock the car.
Alternatively instead of using a wiring harness that converts the Citroen wiring to ISO, you can fit one with an electronic box that will generate a true ignition signal so the radio behaves conventionally. This type of converter allows you to keep steering/stalk audio controls and trip computer functions if you have these now.
// Missing Lincs
This guys mentions that swapping pin 4 and 7 is just about good enough. But some odd behaviour is expected. You need to by a harness with electronic control box to get it right! In another thread, this product, called CTSCT002 from Connects2 from ebay is claimed to be one such electronic box one needs to install to get the correct behavior. The developer explains on their site that it is used to maintain remote functionality similar functions - specifically the C3 pluriel version - but I guess it would be suitable in our case too…. This box, sold on BRL.se seems to do the same thing, but cheaper. However, it is not sold with a label, so it may be a cheap copy-cat. I assume this one, called CT20UV09, also from Connects2 could work as well. It picks up a fly-lead 12V switched power, so you need to find some other power line with the expected ignition switch behaviour (such as the cigarette lighter).
Conclusion
I installed the new unit. It works well. There is some odd behavor. For example, the digital clock on the dash board is now not updating. It sets the current time when I start the car,and then it is fixed for the whole ride. I guess that the old Clarion did the update logic via the VAN data bus, but now that does not work.
The head unit can also be turned on even if the key is not in ACC/ignition mode (as long as the VAN+ is on), which is a risk for a power drainage. That seems okay for now though.
If one had a remote on the steering wheel, I guess that would be broken now, since that communication is over VAN. But I did not have that, thankfully, so no harm done.
Finally, I will ask my normal car workshop to throw an eye at the installation next time I leave the car for service - in a week or two.